I’ve been on Twitter and Reddit. The rumors have spoken. Everything in nerd culture is a failure.
Yet am I foolish for blowing into the cooling embers of hope? What if there was a niche corner of nerd-dom that would allow nerds to almost “meditate,” grabbing a much needed respite from the social media tsunami swirling around them? What if there was a relaxing nerd hobby, in other words?
I stumbled into Hirst molds because I was a nerd looking for a relaxing creative outlet. The nerd part of me drove the research, which drove me further and further down the Hirst rabbit hole. And the creative outlet side is still a work in progress, yet I can 100% confirm the relaxation outcome. So let me introduce you to Hirst.
Hirst Arts is owned and operated by Bruce and Joanne Hirst. They make high quality rubber molds by hand that allow nerds like us to create little bricks, blocks, and pieces to use to build fantasy terrain and buildings. You pour plaster into the molds, wait a few minutes, then pop them out, giving you homemade “fantasy LEGOS.”
Bruce Hirst has a treasure horde of projects on the Hirst Arts website, ranging from castles to caverns to village buildings and even some science fiction. You follow his step-by-steps instructions, buying molds to fit that particular project, or you can go wild and create plaster blocks to create your own design.
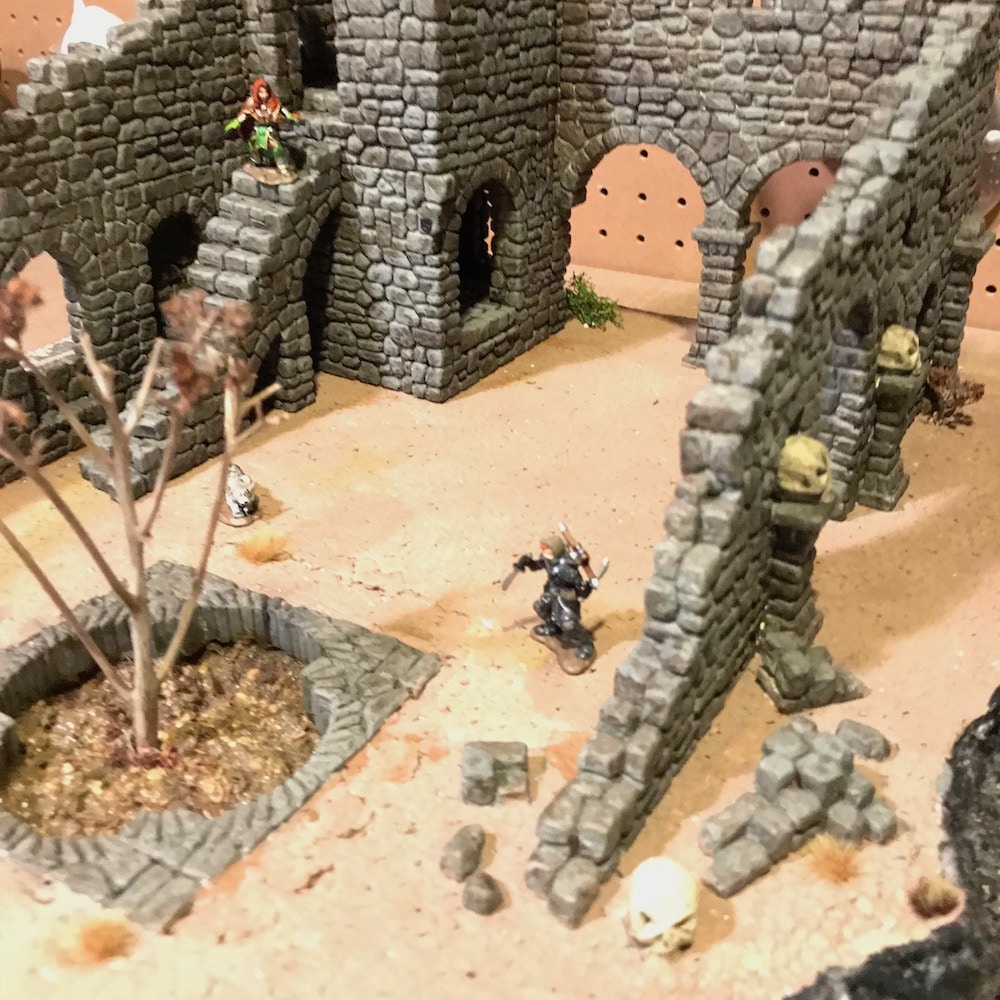
Making the Ruined Tower
Prev 1 of 9 Next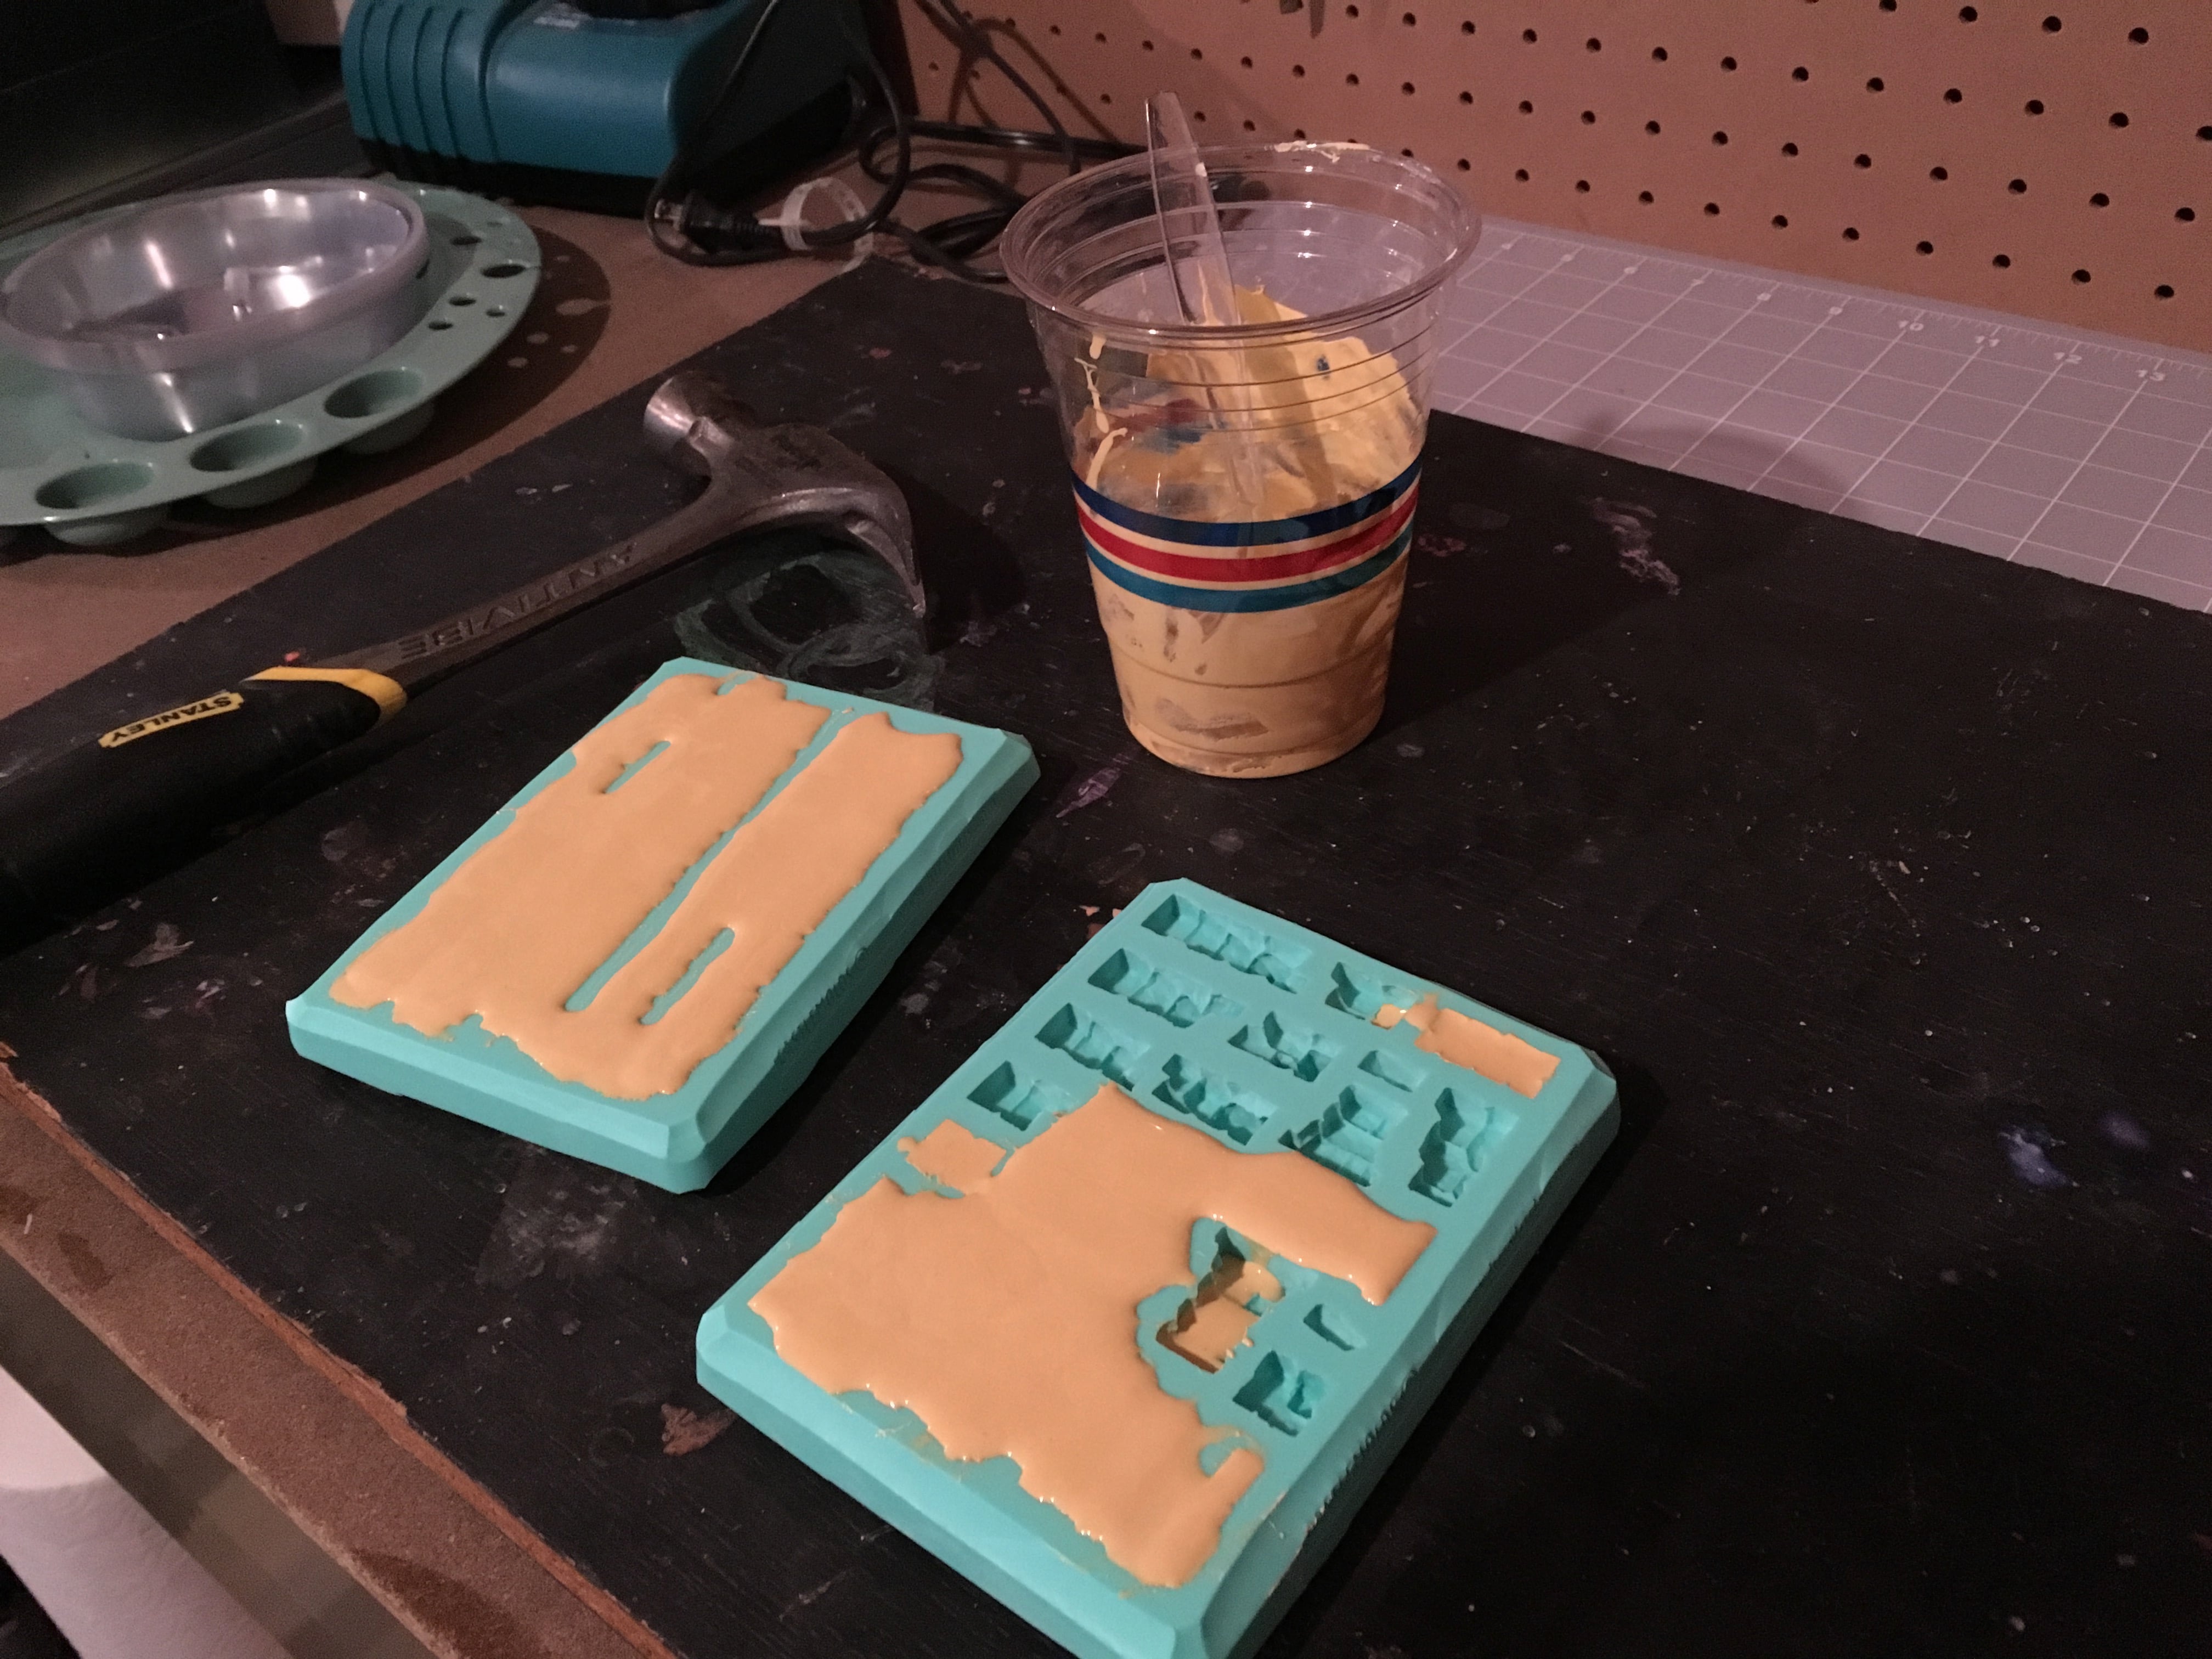


Let Me Walk You Through the Hirst Process
[bs_smart_list_pack_start][/bs_smart_list_pack_start]
Select Your Project
I selected a Ruined Wizard Tower for my inaugural project. An old wizard tower with a run down courtyard is always an evocative setting for a fantasy tabletop roleplaying game, so it was a project that had some future utility to it. Besides, who doesn’t like wizards? (Link: Ruined Fieldstone Tower.)
But the main reason I chose a ruined tower was because it was my first project and I wanted my kids to be able to help. Do you know what doesn’t require precision? Ruins. So if my girls wanted to help glue the blocks together and they were slightly out-of-line, then it became a feature, not a bug. “Ruined” anything is a good project to learn on, in other words.
Order Your Molds
Next, I ordered the molds from Hirst Arts. Not only does each project clearly identify which molds you need to create the project, it also tells you how many times you need to cast each mold.
My project required molds #70 and #75 and each needed to be cast about 20 times, which gave me two full cigar boxes worth of blocks. A bonus was the blocks were modeled after fieldstone, meaning any extra blocks can be used to make all sorts of fantasy-esque structures.
Get Your Plaster
Then I ordered my plaster. The plaster you are pouring is actually some stuff used in old school dentistry, so it’s absurdly strong once it dries. It’s not something you find at the hardware store but like 100 million of us, I’m an Amazon Prime member, so I got 25 lbs. of it here with free shipping.
Plopping down some cash for molds, then more cash for a big box of plaster doesn’t exactly allow you to try before you buy, but I’m here to tell you that you won’t regret your investment. Still, I wish Bruce would “box up” a couple pounds of plaster and bundle it with a simple mold that could be marketed as a Beginner’s Box. Maybe some Stonehenge-types ruins?
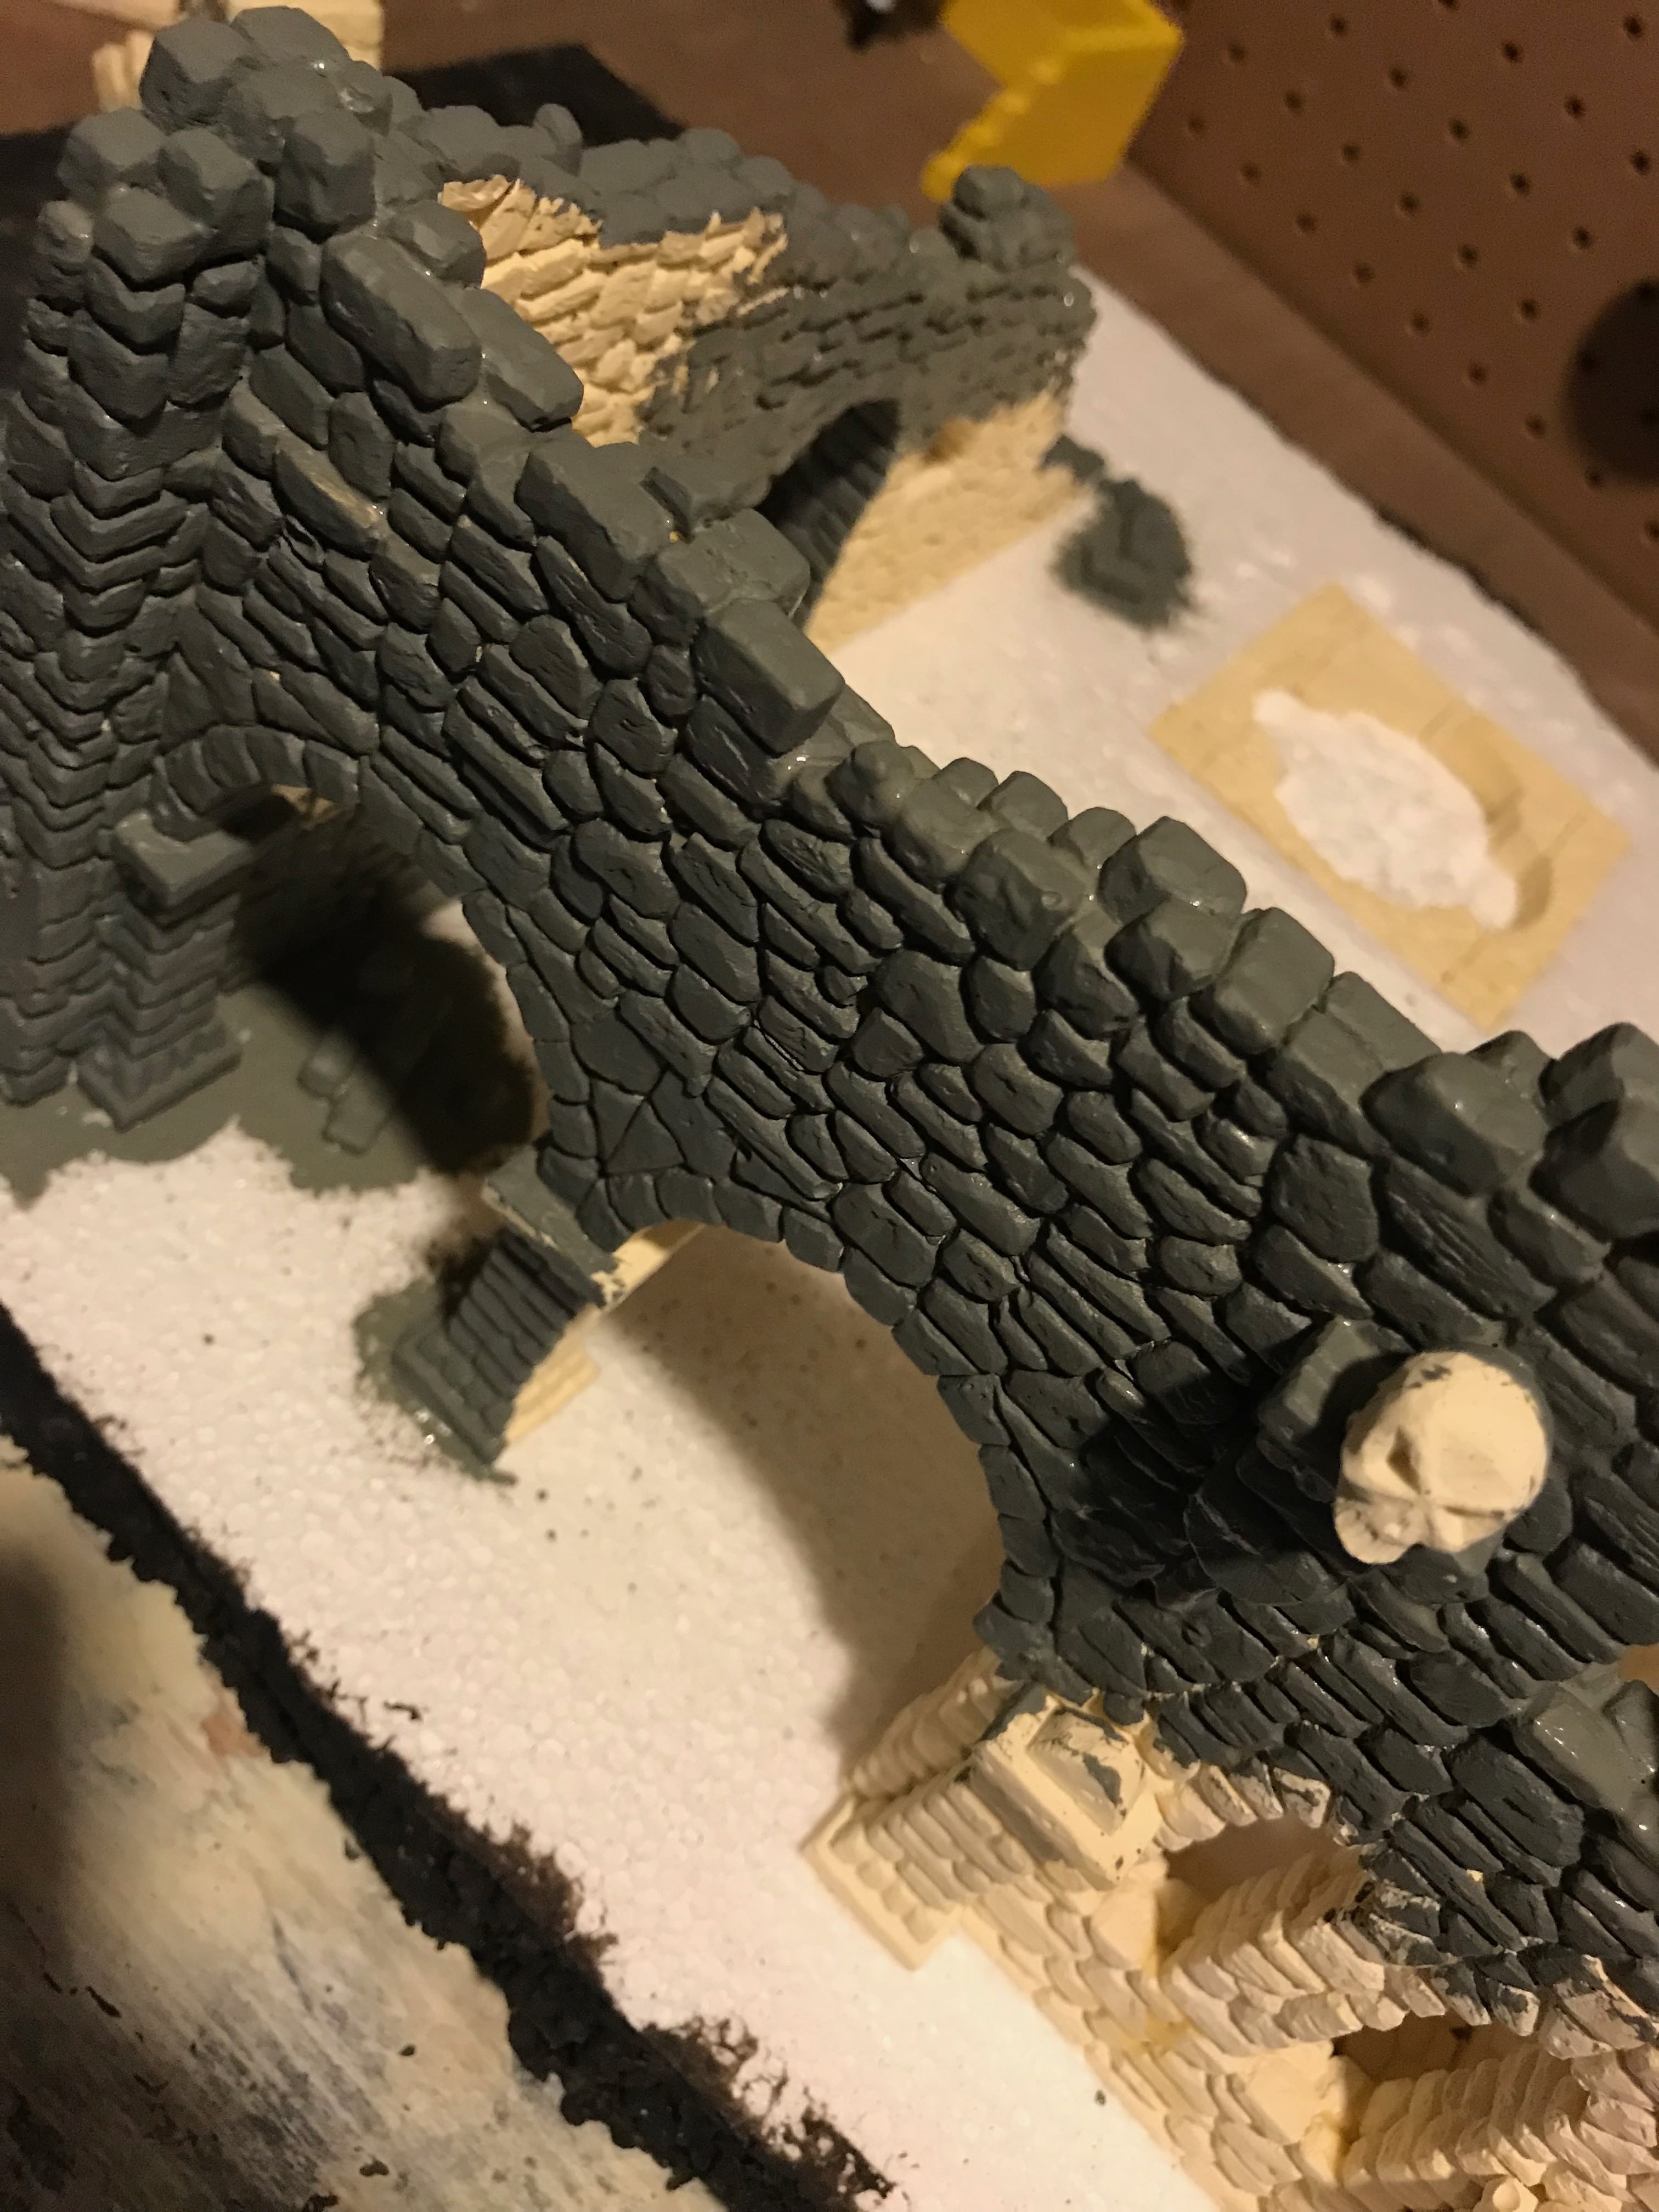
Start Pouring
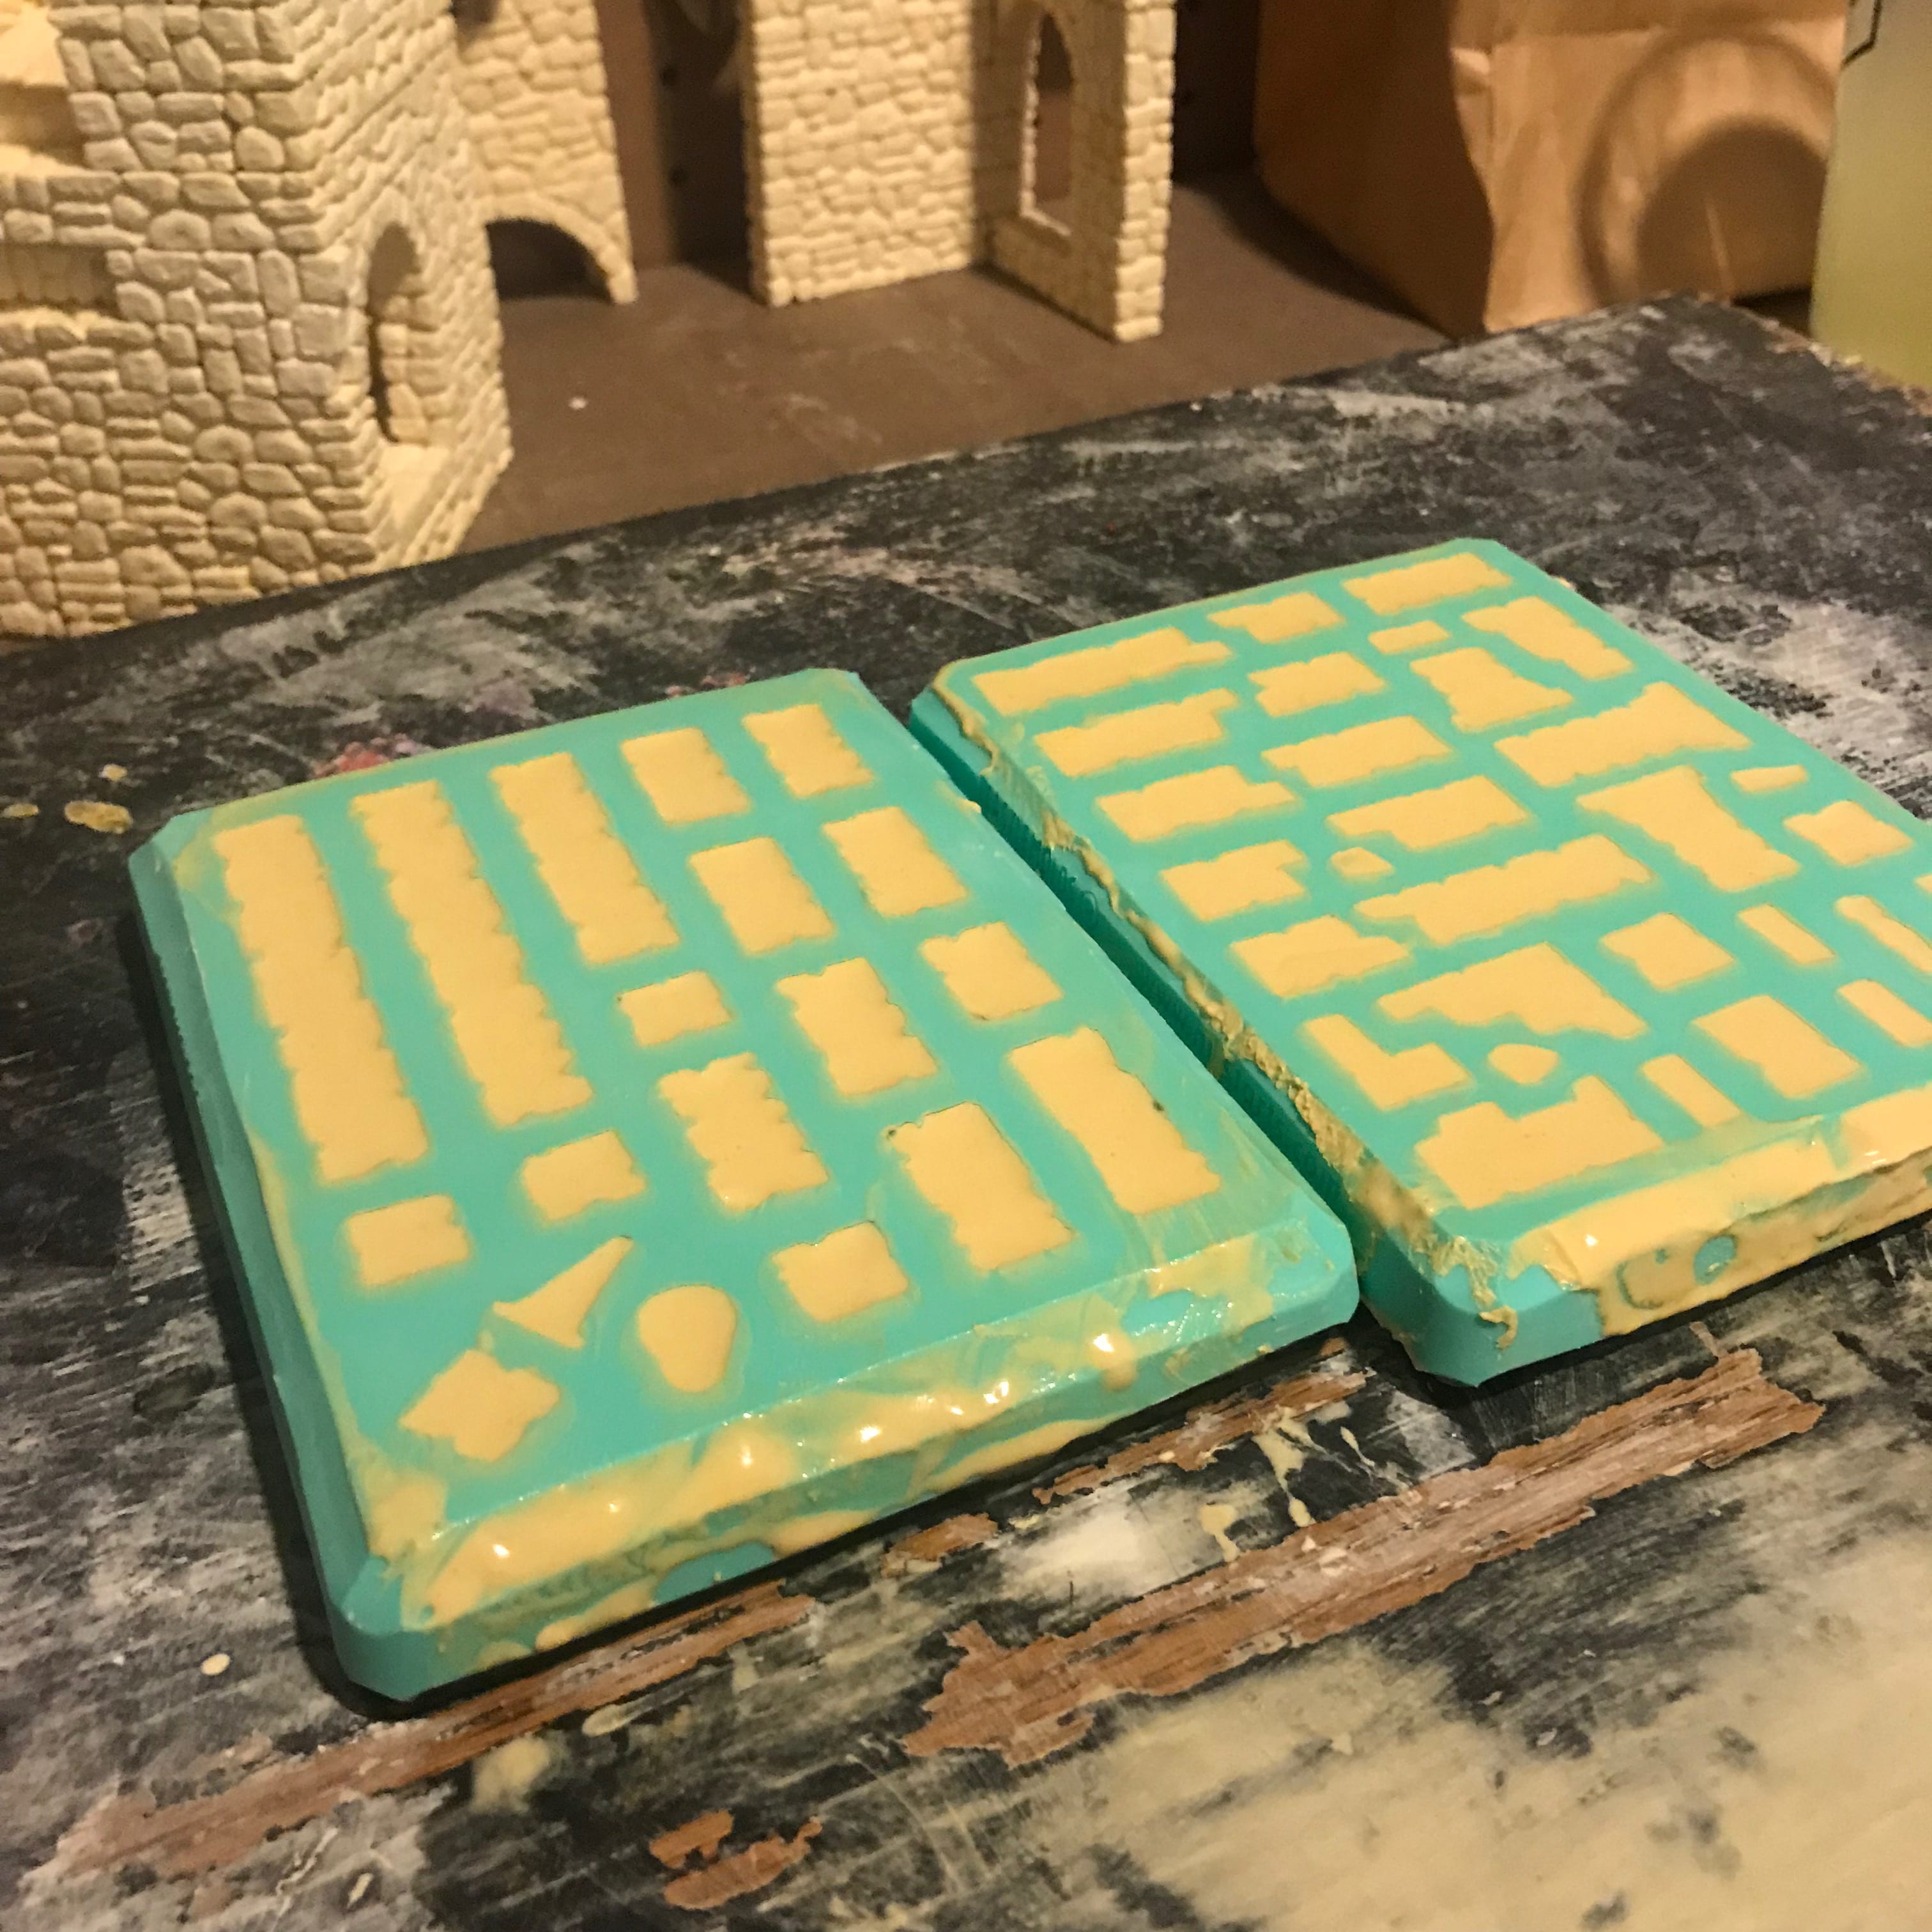
After my supplies were in hand, I went to work. Pouring is surprisingly easy after you watch Bruce’s brief instruction videos. Further, as I mentioned in the lede, it’s surprisingly relaxing and it makes for a nice creative outlet. As everything is digital around us, it’s a nice change of pace to create something tactile, even if you have no idea where you’ll store it later.
I let this process drag on. I’d pour molds in the evening, then let them dry overnight. I’d pour molds before I went to work, then I’d pour another set when I got home. Maybe I might sneak one in between loads of laundry. The point was this was meant to be relaxing, so I didn’t set timers in order to maximize my output. I just sort of wove pouring into my normal day.
Start Gluing Bricks
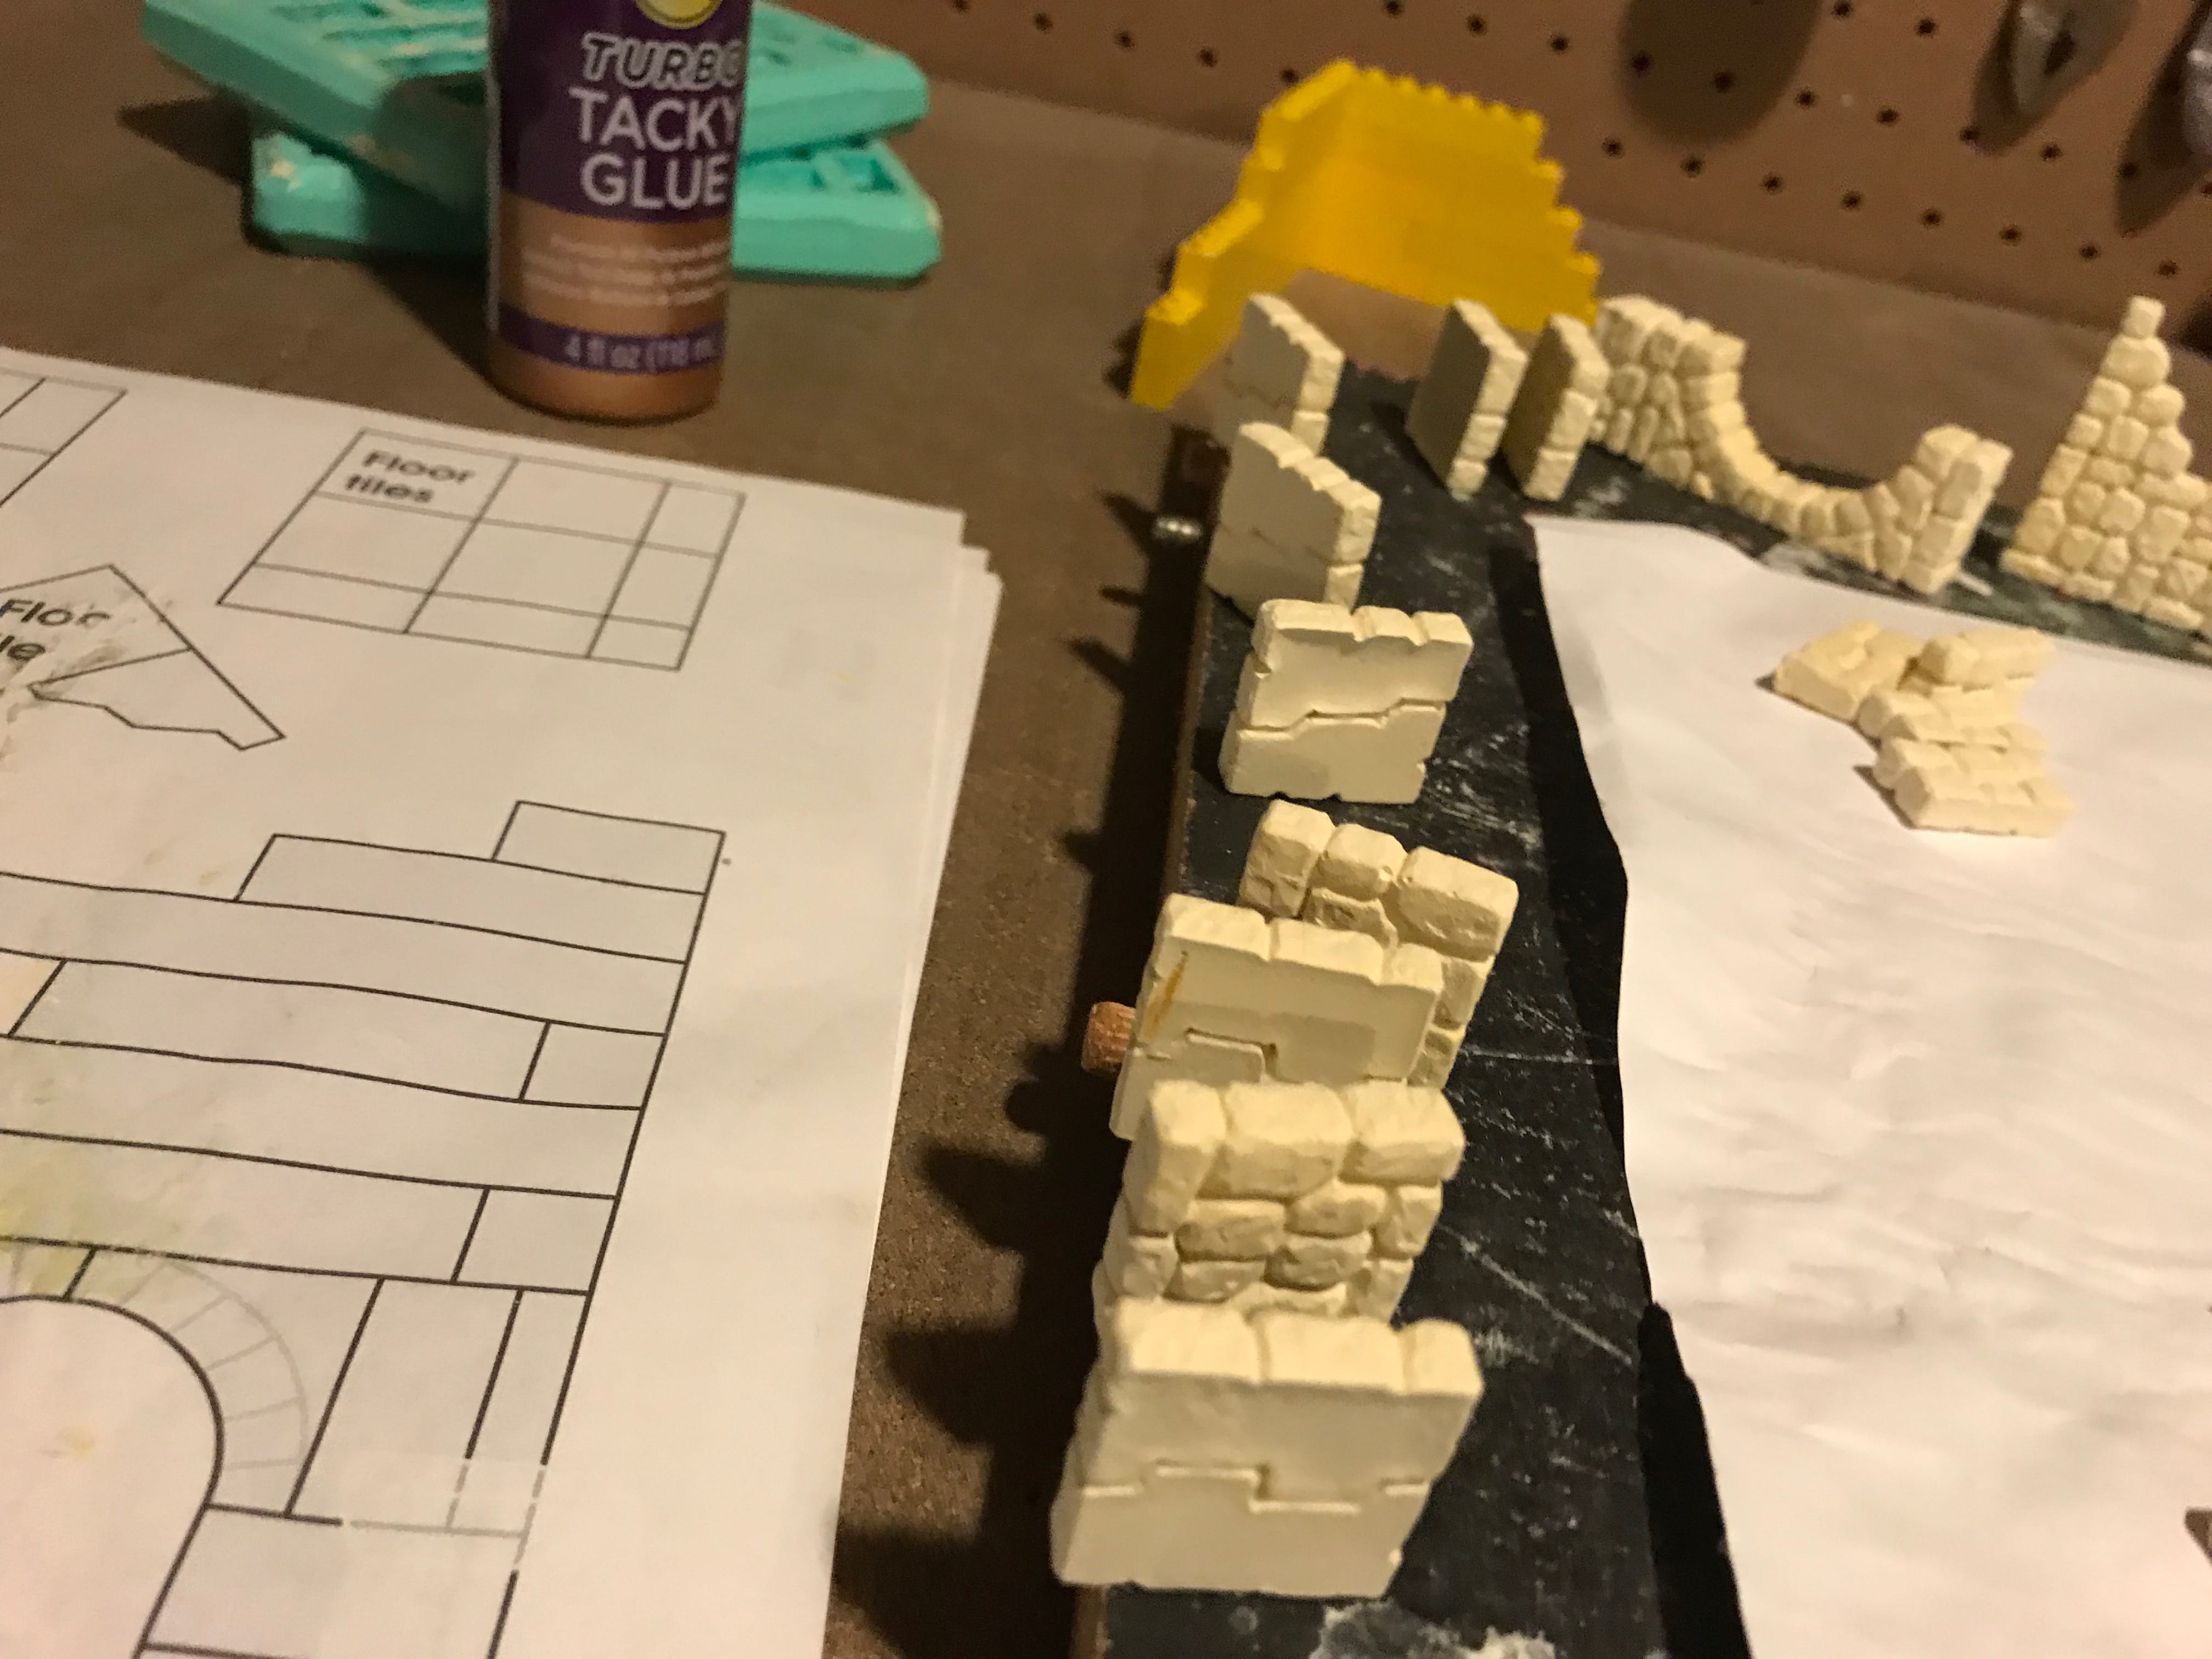
Once I had a couple boxes full of bricks, I hopped back onto hirstarts.com again and printed out the building plans. Bruce really makes things simple and step-by-step. Further, he adds tons of useful little tips to help make things easier. Everything is on the website.
Using simple tacky glue I bought on Amazon, I let my girls start to glue the bricks together. The glue adheres excellently and the dental plaster is super resilient, so everything feels really sturdy. And gluing the bricks together is one of the best parts.
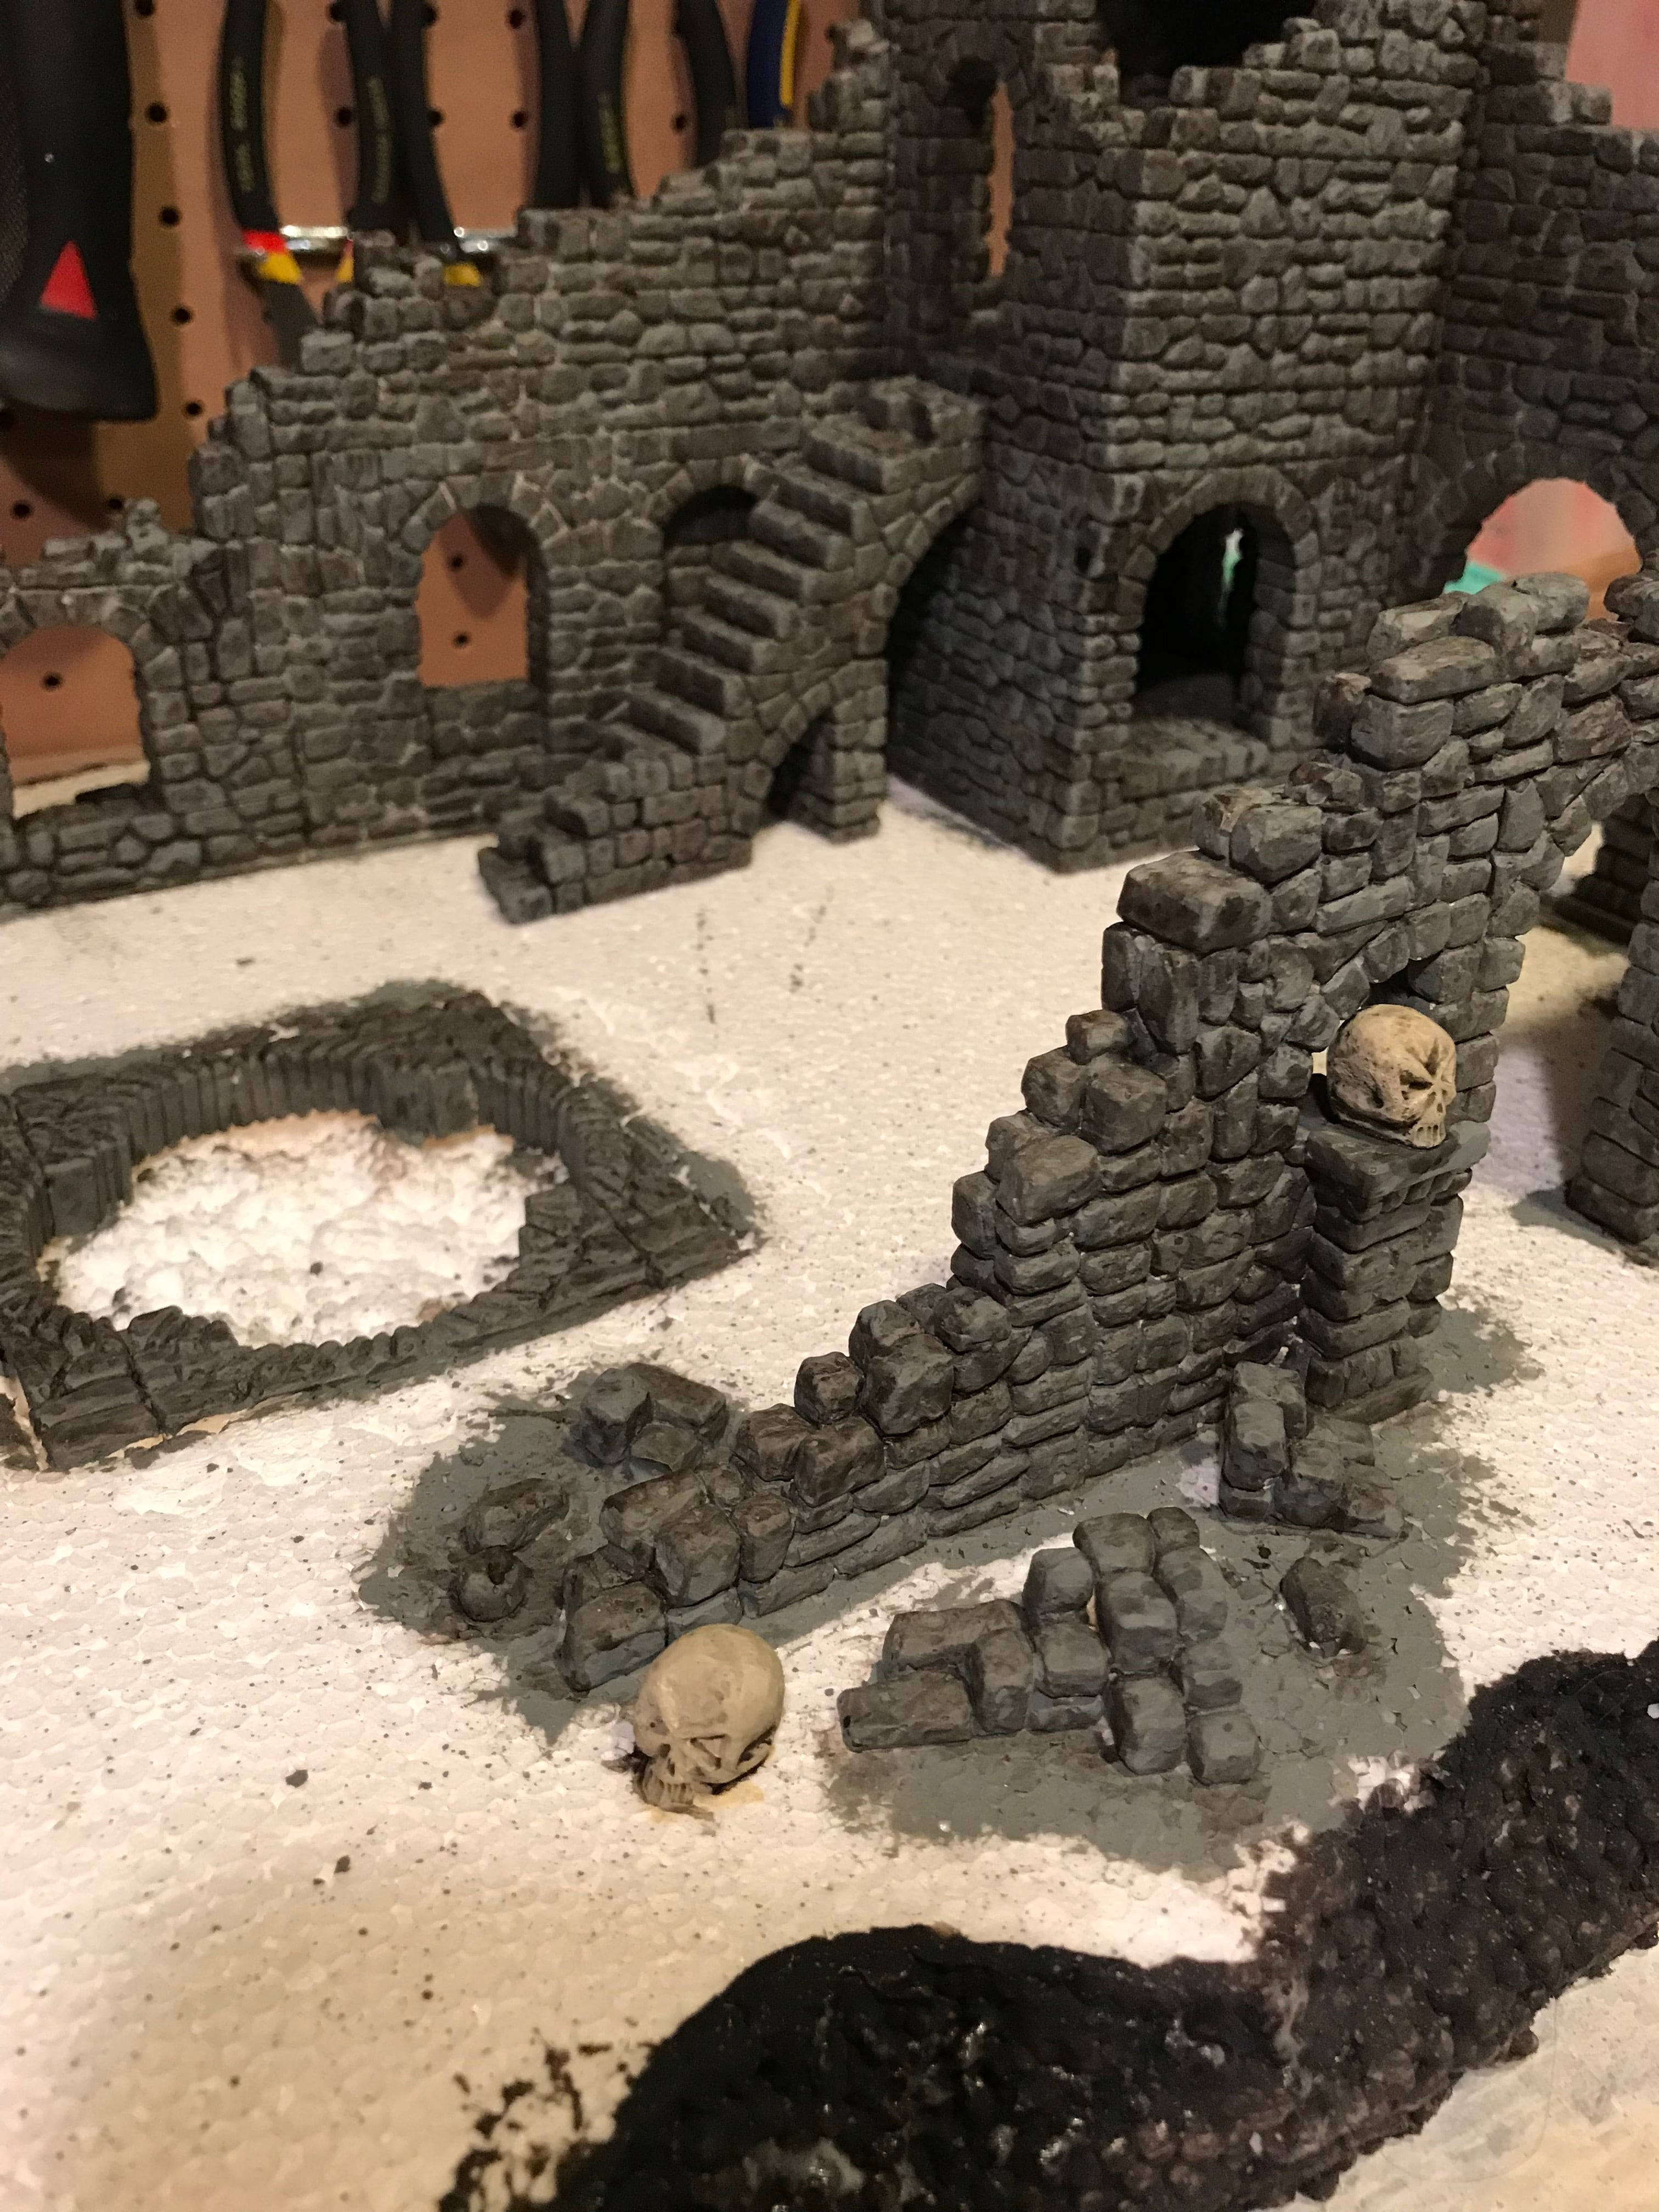
Time for Assembly
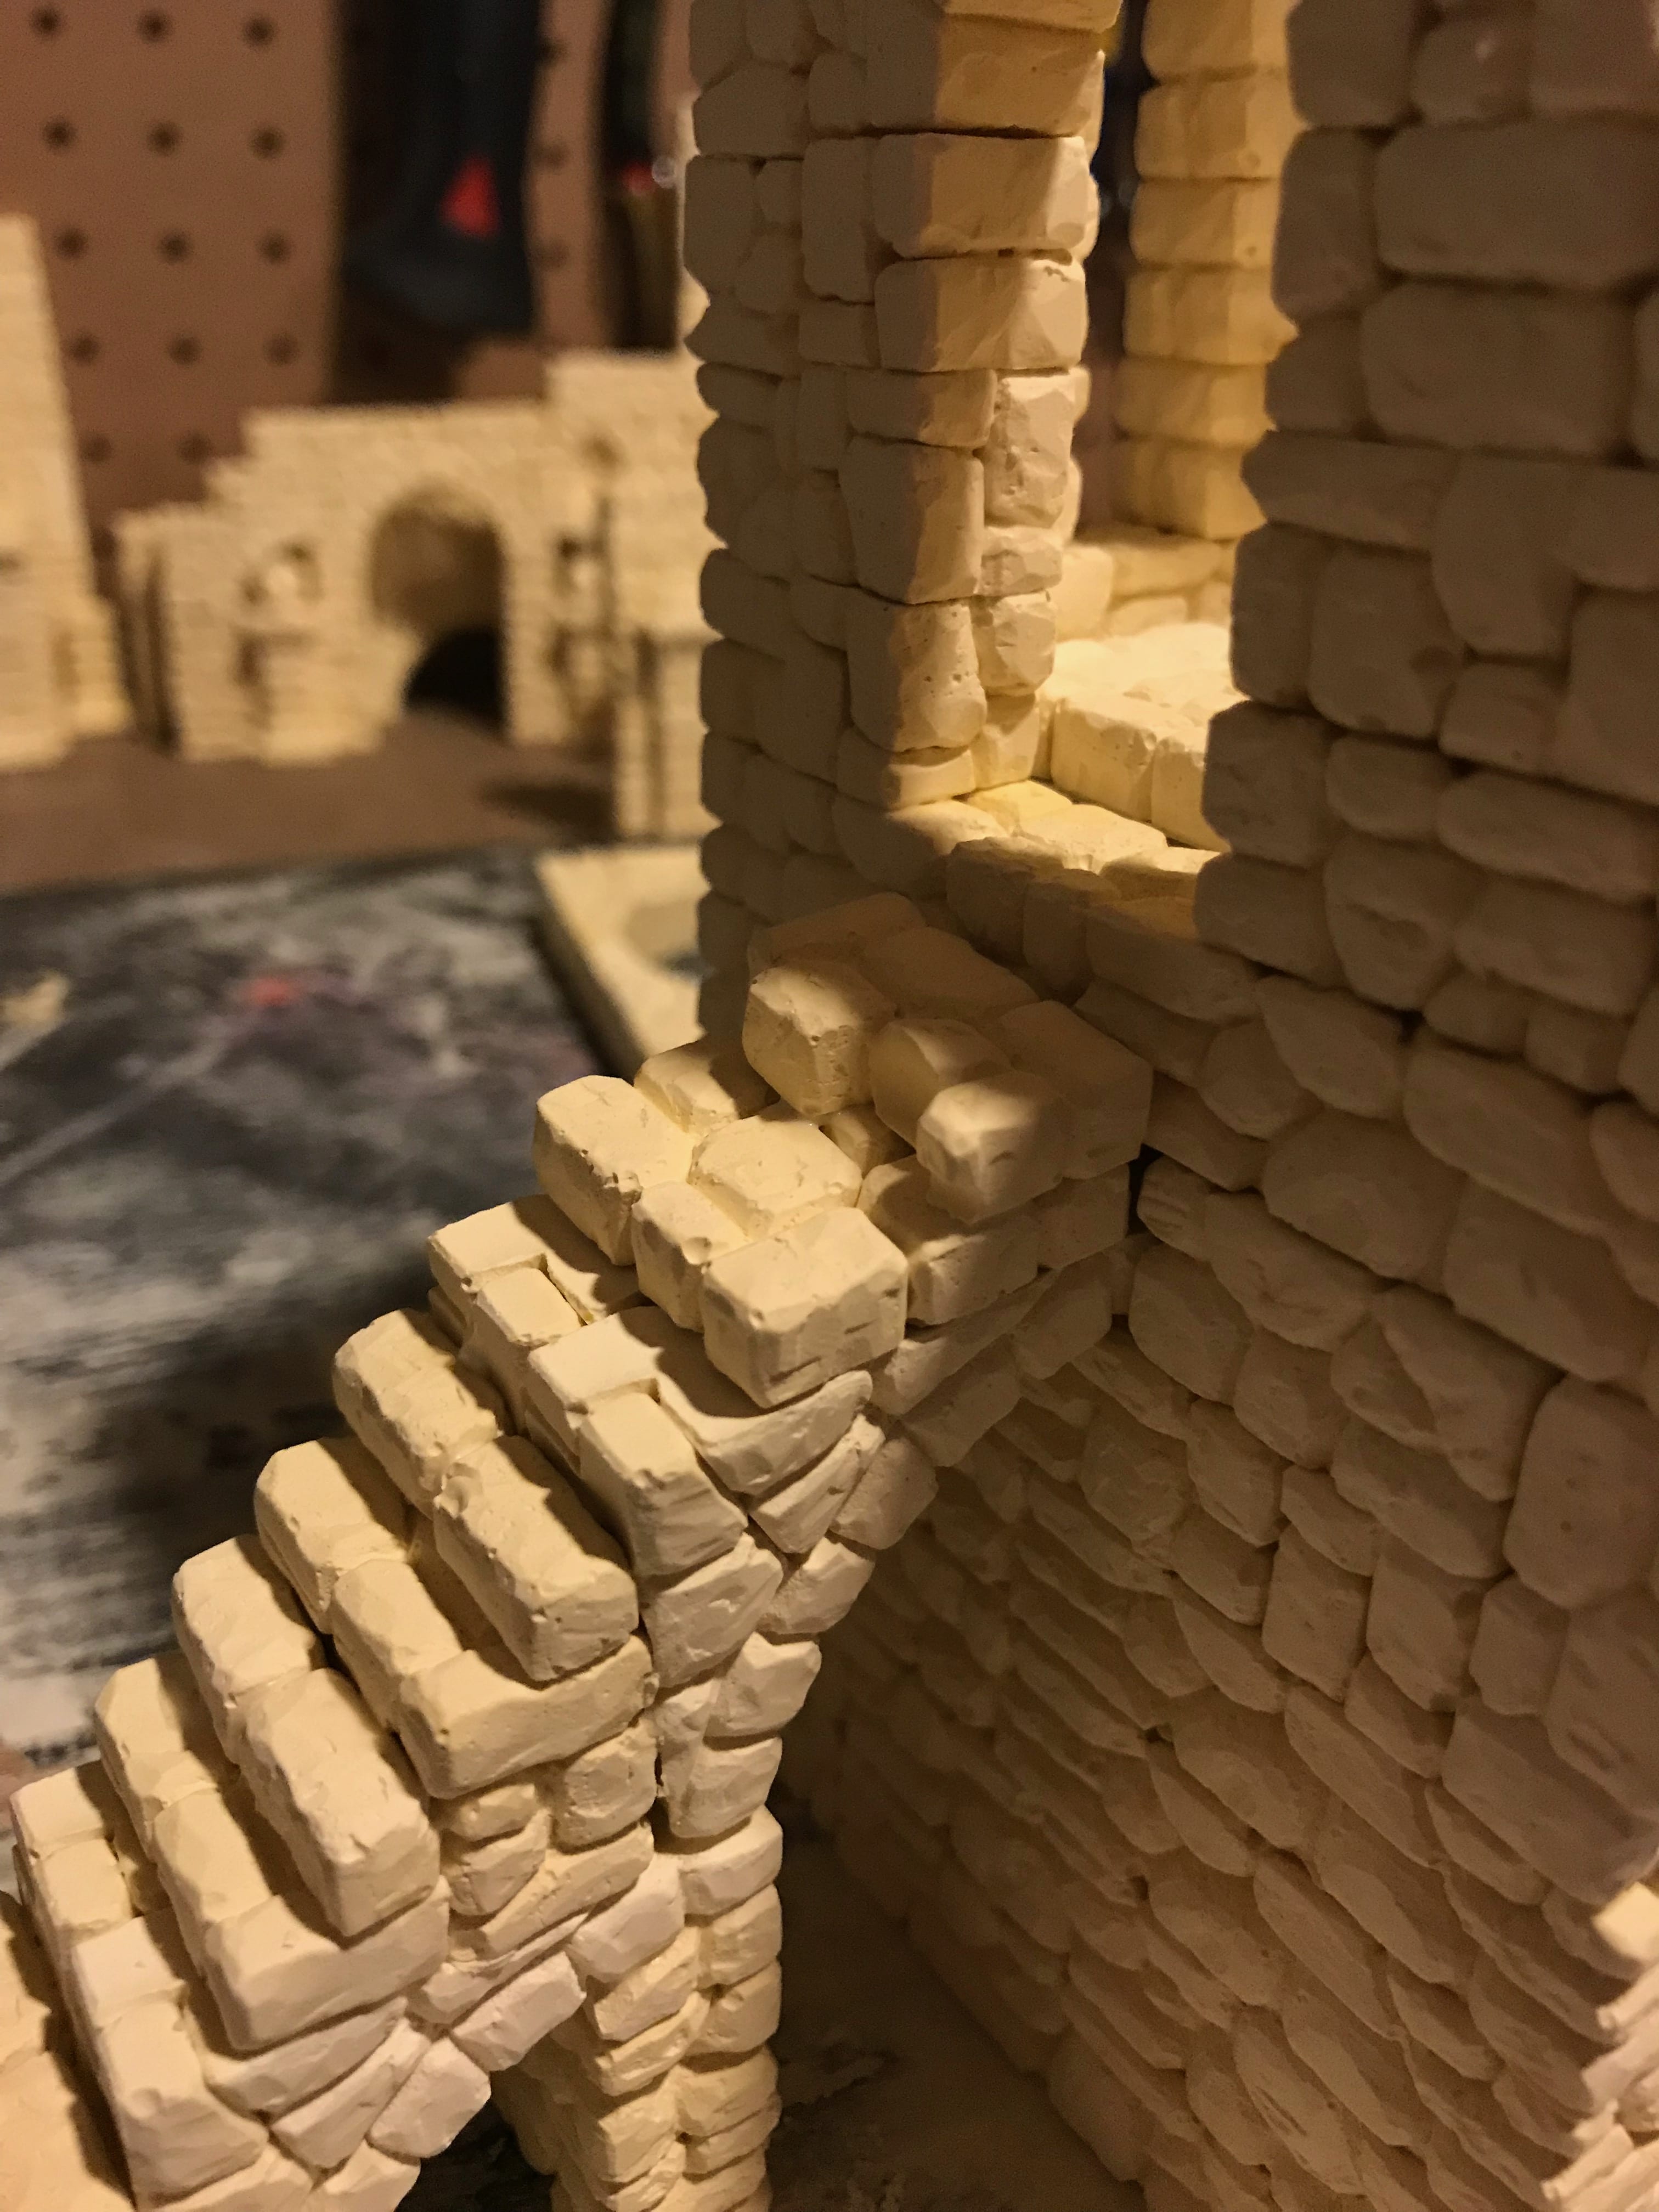
Once the pieces were glued together, it was time to assemble them according to Bruce’s instructions. My girls girls glued the tower together backwards, so we just went with it and made our own floorplan. So instead of the closed courtyard on the official plans, our ruined fieldstone tower has an open courtyard and lower walls.
While the overall structure is mounted on a Styrofoam board I salvaged from a shipping box, the tower itself is designed to come apart. So if you remove the steps, you can pull away the tower front, exposing three removable floors. Consult your Monster Manual for what might be hiding in there.
Let the Painting Begin
I got a cheap bottle of grey acrylic and went to town on the bricks, using a little white to lighten the overall tone for the first layer. A good replication of stonework has lots of crevices obviously, so getting the brush thoroughly over everything is a pain. And wrecks a brush, so don’t use an expensive one.
I then painted over the entire structure with a wash from Army Painter. This whole process only took a few minutes but gave everything so much more shadow and depth, because washes are magic. I then gave everything a little dry brush of the grey. Again, this is a “ruined” tower, so a dark, messy look is a feature, not a bug.
Ground it All
The final step was to paint the base a brown color to simulate old, cracked earth. I wasn’t trying to earn a Masters degree in Fine Art with this thing, so I just wanted a base that would be good for pushing miniatures around.
But I did stick down an occasional tuft of “grass” from the Army Painter Battlefields line. If you paint miniatures, having some grass tufts around is golden, and placing a few around the terrain piece was a no-brainer, as it added very subtle highlights.
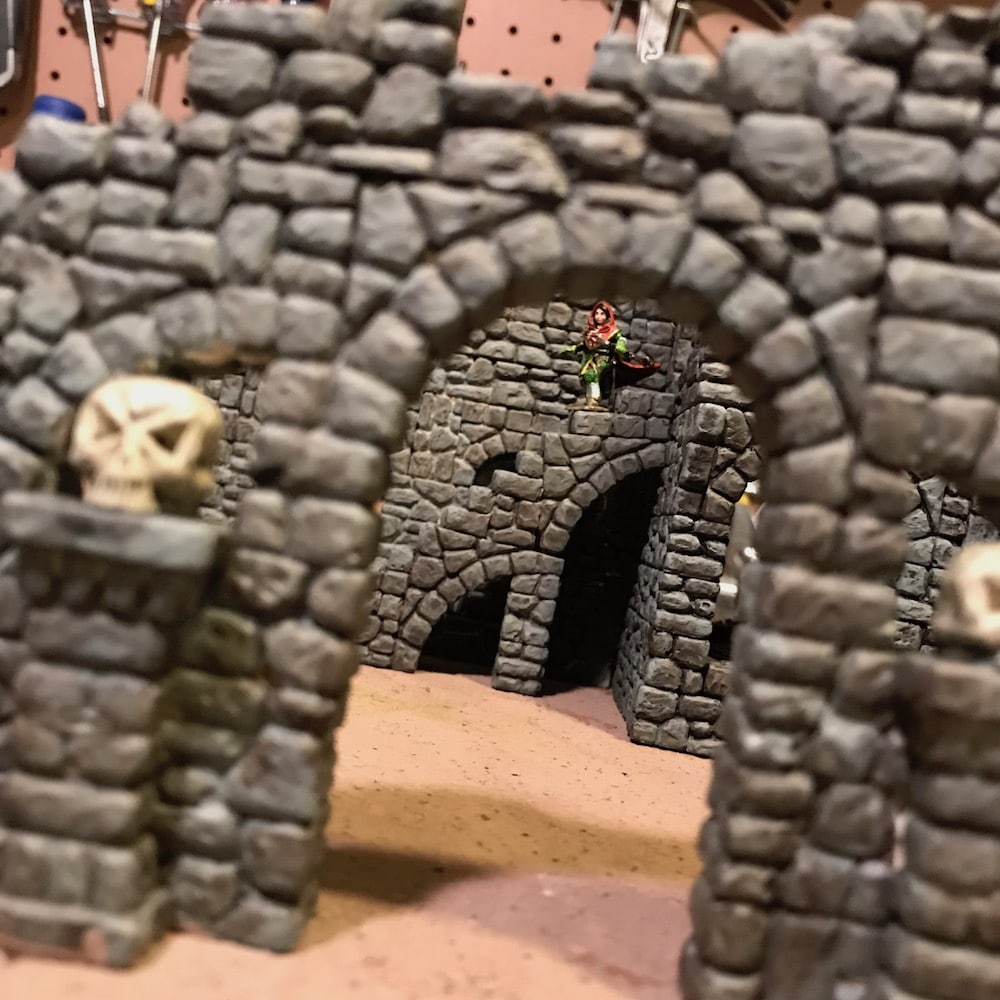
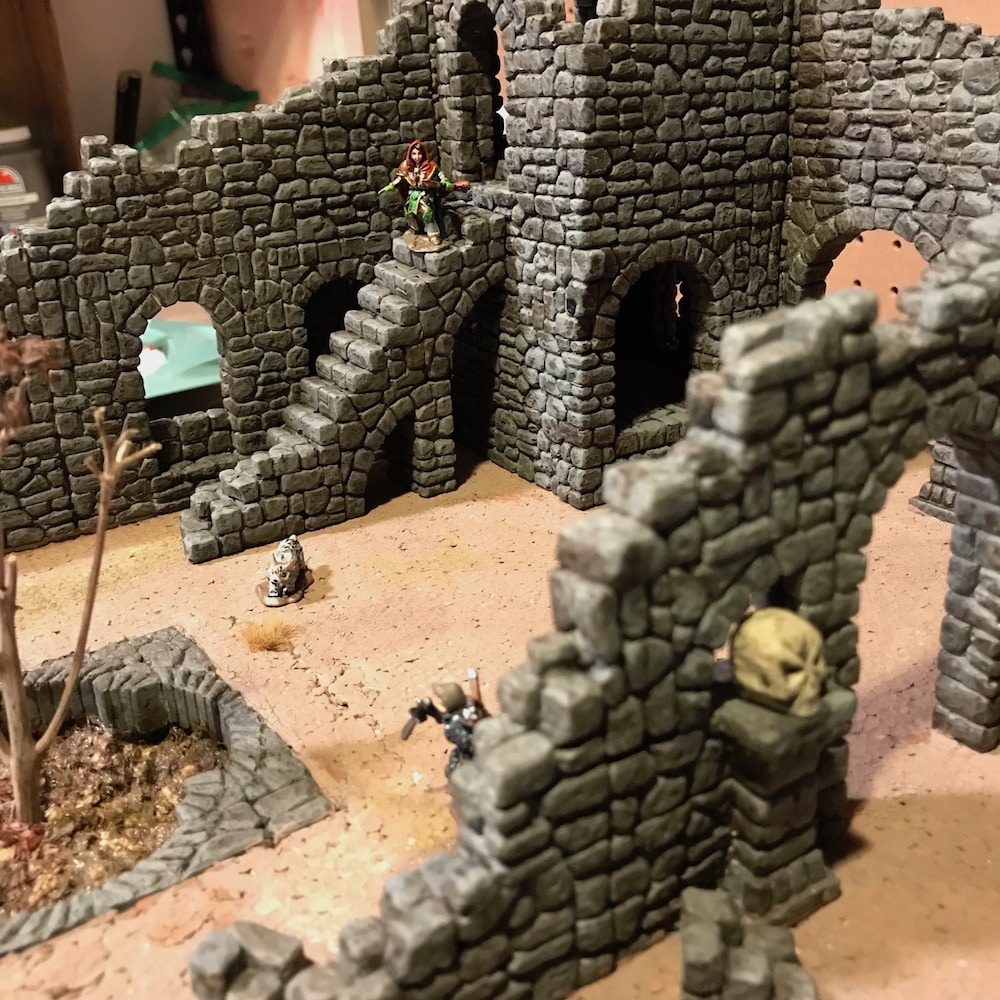
Below is the final product with a few Wizkids miniatures on there for scale.
[bs_smart_list_pack_end][/bs_smart_list_pack_end]


I love the process of pouring Hirst molds, then crafting terrain. It’s creative, it’s relaxing, and it’s satisfying.
I’m not good at it. I spotted a million things to “fix” with my ruined tower. It takes time, even if you are laid back about it and fit it in the cracks of life. I don’t have anywhere to store the stuff, nor do I know how often I’ll actually use the terrain.
But I don’t care about any of that. I loved the process, the art and the getting my hands dirty of it all. I can’t recommend it more highly. It’s not an “easy in” but if Hirst Arts sounds like the kind of hobby you’ve been jonesing for, pour yourself into it.