As a child, you’re given toys to challenge your dexterity. First it is blocks, then LEGO, then something more advanced like model kits or IDK, IKEA or something. They help your mind grow, and best of all, you don’t even realize you’ve become a builder. Because they’re fun.
Then you grow up and society says making models is lame. You’re supposed to filter all of that ingenuity into your job! You’re not supposed to build little plastic airplanes or paint miniatures anymore; you’re supposed to build a shed in the backyard to house the tools you need for completing never ending tasks around your property. If you enjoy handy work, fine. But it’s not why you’re doing it.
The closest thing to model-making that’s permitted of an adult is restoration. You can fix up an old convertible or reupholster a busted loveseat. Those things are fine, because the end product will be usable for something. Again, it all comes back to practicality.
The thing is, restoration is expensive. Not everyone can pay to gut and remodel an Airstream trailer. It’s much more financially responsible to restore old GI Joes from your childhood!
So why then are broken GI Joes looked down upon like they are some childish thing? Why is replacing an O-Ring in an old Joe rather than a faucet considered a “guilty pleasure” rather than just a “pleasure”? And why am I considered a reclusive nerd, other than the fact that it’s true?
Because you allow it, that’s why.
But you don’t have to! You can say, “Screw it. I’m fixin’ up my old Joes. So if you need me, I’ll be down in The PIT, fitting tiny plastic pieces together into a fighting force against Cobra. Because that’s what I want to do, and no, I won’t apologize.”
A Dreadnoks Guide to Fixing Old GI Joe Figures
GI Joes see a lot of action, so it’s understandable the figures would break. So let’s fix up our old GI Joe figures, shall we?


But, first, a caveat: this is a complete beginner’s guide. A Dreaknok could do the three things we’ll discuss here. But I hope it lights a spark in you, because at the end I’ll share some resources that will step up restoration into Dr. Mindbender levels of expertise.
 Replace that O-Ring
The wonderful thing about old Joes (and the reason they were better than Kenner’s similarly-sized Star Wars active figures) were there many points of articulation. The O-Ring was a huge part of that, as it allowed total movement in the hips.
But those rubber O-Rings degrade over time, so it’s likely that most–if not all–of your old Joes are in need of a new one.


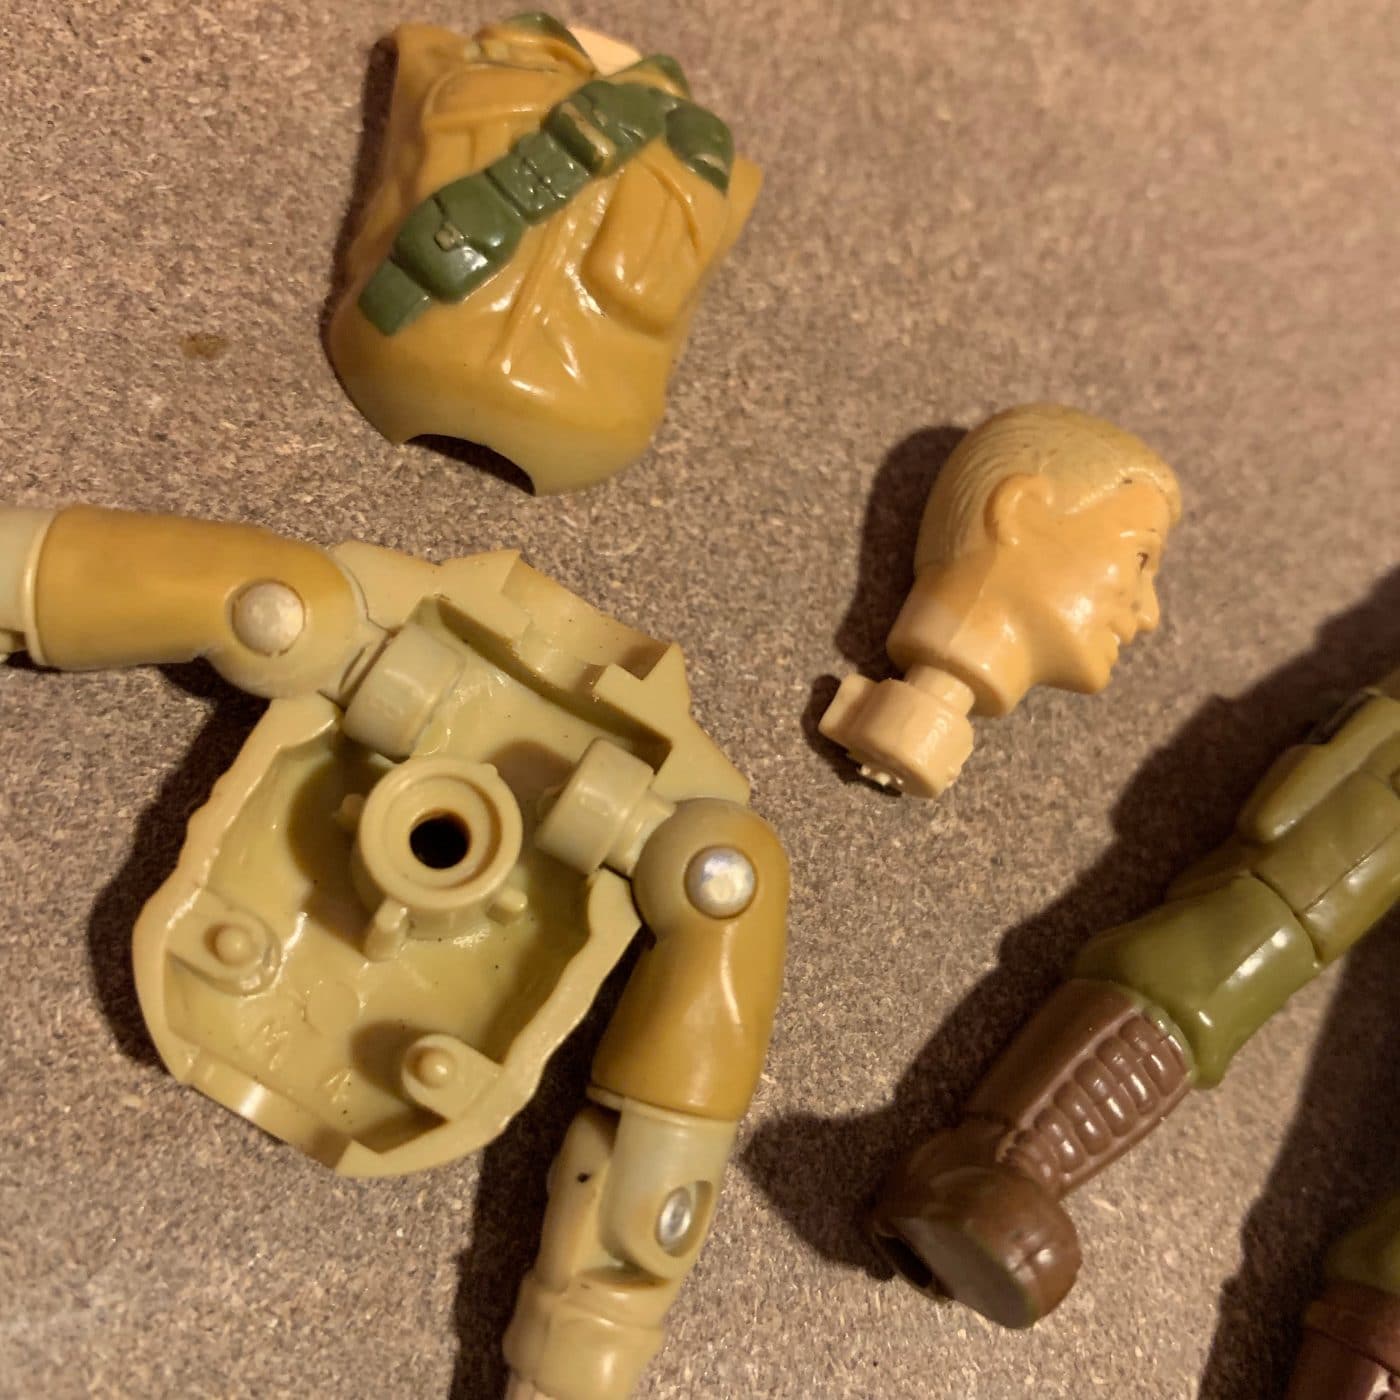
- First, make a supply run. Walk into Ace Hardware and ask for a pack of #9 rubber O-Rings and you’ve got your start. But you can buy fix-it packs from eBay or Amazon and many of those will also include replacement screws or even the T-Bars that attached the legs together.
- Second, take the screw out of the Joe’s back. The O-Ring went around a peg in the center of a Joe, then looped down to hold on the hips and legs. To get at that, you need to open up that Joe, which is often harder than it sounds. Good boys and girls played with their Joes in harsh conditions, meaning the screw might be rusty.
- Lastly, put it all back together. You need to loop the O-Ring over the back peg, then re-insert a fresh screw. The trick is you’ll need to then re-attach the hips and legs, but there are lots of techniques for this. I simply attached a small zip tie to the O-Ring so that after the screw is back in I can pull the zip tie through the hips to stretch out the O-Ring, allowing me to re-hook the legs. It’s not hard, you’ll just feel like you need three arms.
Touch up the Paint
While we hold a lot of nostalgia for our old Joes, the paint was never detailed on the old action figures. In fact, as a cost cutting measure, a decision was made to have one of the launch figures be all black. Enter in the commando we all came to love: Snake Eyes.
So, buy a starter kit for painting miniatures. I recommend this one. It’s inexpensive and includes a brush and even a miniature you can paint up later. Most importantly is it gives you 10 colors of paint, plus a guide to allow you to mix up new colors.
But the reality is you’ll mostly be using black. When I touched up Recondo, I noticed his boots were scuffed, as was his knife, pistol, and watch. Spiffying those up was nothing more than just a tiny touch of black paint.
That, and I spiffed up his glorious ‘stache. Just that little bit of paint vastly improves the look of old Joes and it in no way requires painting skill or experience.


One Tip: You’ll notice that old Joes had a glossy look to them, so don’t use a flat paint. If you do, a little brush on shine is nice. You can get that here.
Replace a Thumb
Thumbs get a bad rap but those didn’t break off nearly as much as people talked like they did. But if your old Joes do have a broken thumb, I’ll tell you how to make a new one. But what did break a lot? That little cod piece on the hips. This is also how you can replace or reattach that.
- First, make a supply run. You’ll need to drill a wee itty-bitty hole, so you’ll need to gear up. This Army Painter model drill is an inexpensive set that comes with several bits. While you are at it, get some “Green Stuff,” which is a two part modeling clay that you’ll use to mold a new thumb piece.
- Next, drill that hole. The reason you want to drill a hole is a thumb will never stay if you simply mold one and glue it on. So, you drill a tiny hole, then you snip off a tiny piece of paper clip that you use as a pin.
- If it’s the hips, drill into the other side. Many of my Joes (like Recondo) had a broken cod piece. I simply drilled into both sides, then inserted a span of paper clip in order to pin the two sides together before I glued them.
- If it’s the thumb, sculpt a thumb around the paper clip. Once a paper clip is inserted into the drilled hole, it can be shaped, then snipped off to create a thumb bone (that’s a phalange for you biology nerds). That makes easy work to use a little Green Stuff to recreate a simple thumb. After a little paint you’ll hardly be able to tell it’s not original.


Again, a dummy Dreadnok can do the above. They are just three options to get you started with fixing your old GI Joes, restoring them to be America’s elite fighting force.
If you want to work up to advanced changes the likes of which would impress even Dr. Mindbender, then you’ll find there is a robust fixer community online. It goes as far as an entire community that molds and creates entirely custom Joes.
But a great place to start is Twitter. There are some easy follows to get you into the world of fixing Joes. The one to start with is Boil and Pop. Then search the #GIJoe hashtag.