It’s time to learn a cool cosplay trick of how to make glowing gems. Glowing gems are a nifty accessory that’s perfect for whether you want to become a Crystal Gem from Steven Universe or if you are planning to make a Dragon Age Mage staff, like me!
How to Make a Glowing Wizard Orb: Materials

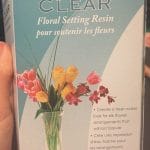
- Crystal Clear Floral Setting Resin (Joann’s)
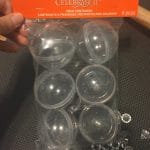
- “Treat Containers” (Michael’s)
- Clear plastic gems (Joann’s, but clear jewels, iridescent flakes, glitter, and other effects can work too)
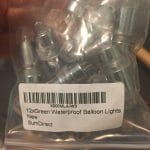
- SumDirect mini LED lights (amazon.com)
The first thing to do is…
Get the clear treat container(s) and twist them open from the middle. The containers I got had holes on the bottom of one half for each of them, so I covered those sides with masking tape.
Now what you will do is measure how much hardener/resin you’ll need in your containers.
- Put the clear gems (if you decide to go with glitter or the iridescent flakes you can skip this) into the container halves as much or as little as you want.
- Pour water into the container halves with the gems, but don’t fill it to the top. (This is only if you plan on fitting your LED in the sphere and closing it. If you have another method of LED placement for your costume then fill the containers up however you see fit.)
- For me I wanted my gem to be a full sphere, but did not want to put my LEDs directly in the sphere so I poured water in both halves, and filled them to the top. If you want to just do half of a gem then just fill one of the halves (or you could do both in case you accidentally botch one of them).
- Pour the water in a paper or plastic cup, and then mark the fill up line on the cup with a marker. Pour the water out of the cup, and now clean out/dry the containers and gems.
- Then put the gems back into the containers.
How to Make a Glowing Wizard Orb: The Fun Part

In the Crystal Clear Floral Setting Resin kit you get two bottles: the hardener and the resin. Now that you have your fill line marked on your cup, kind of estimate and make a half way mark from the bottom to the fill up line mark.
- You will pour the hardener liquid to the half way mark on the cup.
- Then get your resin and fill it up til it gets to the fill up line.
- The kit should come with directions about mixing, so read those carefully (but if you’re lazy, just mix the mixture for 3 minutes clockwise then counter-clockwise).
- Pour the mixture in the container over the gems. Then kind of try to mix what you can in the containers without spilling to get rid of air bubbles.
- Let it set for 12 hours.
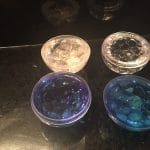
- In the picture there’s a blue pair, I used 1-2 drops of food coloring while mixing to give it the color I wanted. You can always get colored LED lights and use the clear. Whichever works.

The type of LEDs I used were green battery powered and waterproof mini lights that can be put in balloons for party decor. Twist the ends of them tightly, and they last for hours. After the resin is set, put your LED in the orb (if you can) or adjust your LED whichever way you need it to be, and you’re done!
Results
A cool water-like effect that sends all enemies running! Keep in mind the resin was the most expensive thing on the list of materials, and it was around $13. I hope this tutorial inspires you to make creative accessories to top off your cosplay.
Now here’s part two, how you make the wizard staff.
Thanks for reading. If you’ve enjoyed Nerds on Earth, please help us spread the word by using the social media buttons just below.


