Not everyone is a skilled blacksmith, crafting the finest swords and armor from the finest metals. Cosplayers find some creative ways around making the most detailed props, weapons, and armor just out of simple every day things.
I’m here to talk about some cosplay crafting materials, pros and cons, and what you’ll need to work with the materials.
Cosplay Materials 101
Craft Foam
Yes, I’m talking about the stuff you can find in every cheap craft section that you cut out cute little hearts and flowers for scrap booking. Who knew you could make foam into battle ready armor, or even masks?
The pro to craft foam is it comes in different thicknesses and is super cheap. The con is craft foam however is porous and flimsy, so you gotta find ways to prime and make your foam sturdy.
Some things you would want to look into getting when working with craft foam:
Heat gun: foam will warp and form to any curve you want when you apply heat. You can get a heat gun for around $25 on Amazon.
Bondo: Bondo is a cheap kind of car filler that you can find in big tubs in the auto repair section for a low price. This stuff is great for making your foam sturdy. It will take away from of the flexibility of the foam and you will have to sand it down, but it takes the quality up 10 notches.
Mod podge/plasti-dip/caulk: Plasti-dip you can find in most hardware stores, and it’s pretty much a spray primer. It’s great, but I personally go with mod podge for priming foam because it leaves less surface texture, primes just as well, and is les expensive.
Caulk is kind of like priming and adding gesso (or bondo). It lightly makes your foam sturdy, and primes the foam as well. I personally am not sure about the method, but I’ve watched others use the method and told me they like it and it’s not as expensive. It’s all about experimenting really!

EVA foam
You know that foam you see at some daycares or places like Skyzone where they have the thick colorful puzzle pieces on the ground? That’s EVA foam. The great thing about EVA foam is it’s pretty affordable, and it can come in different thicknesses.
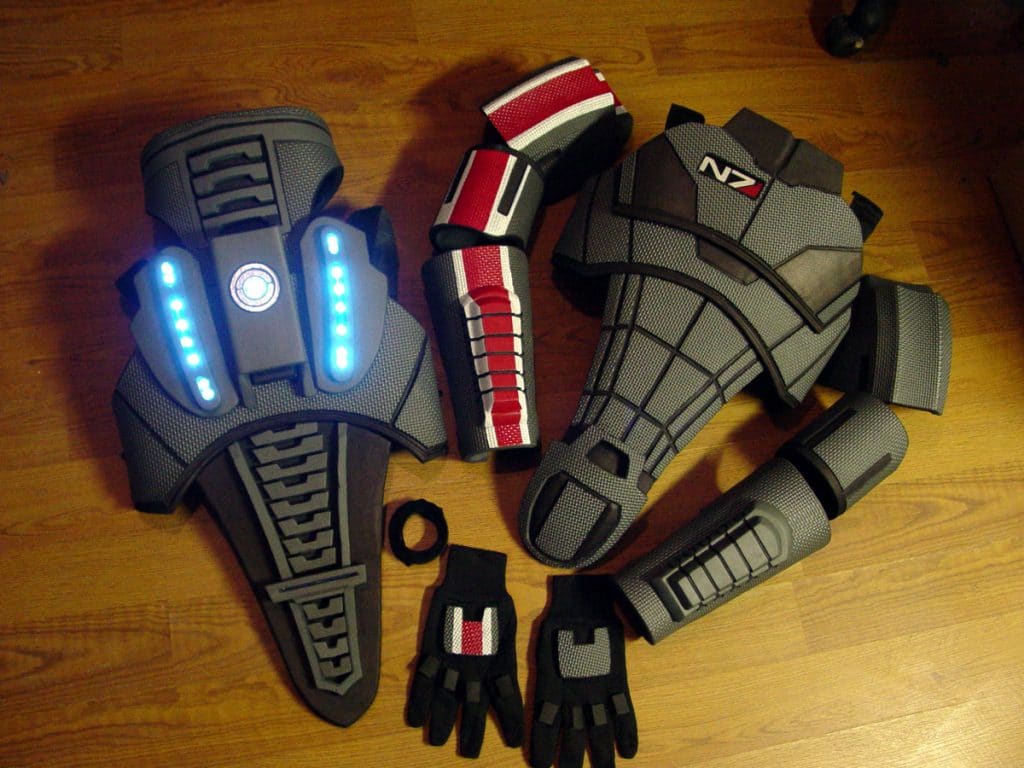
Difference between craft foam and EVA foam is EVA foam can be bought in huge sheets, and there’s more variety in what thickness you can get with EVA foam. EVA foam is a very common foam for armor builds in cosplay. It is more sturdy. It also usually comes with a textured side and a smooth side, and in tons of colors.
For example, a lot of people like to use this foam for making the N7 armor from Mass Effect, because they use that textured side on some parts of the armor. It also just gives the perfect look for that armor, hands down. You’ll need the same materials you would for craft foam, except you’re going to want a box cutter or exacto knife. There are MANY tutorials online to show you how to work with EVA foam that are super helpful.
Worbla
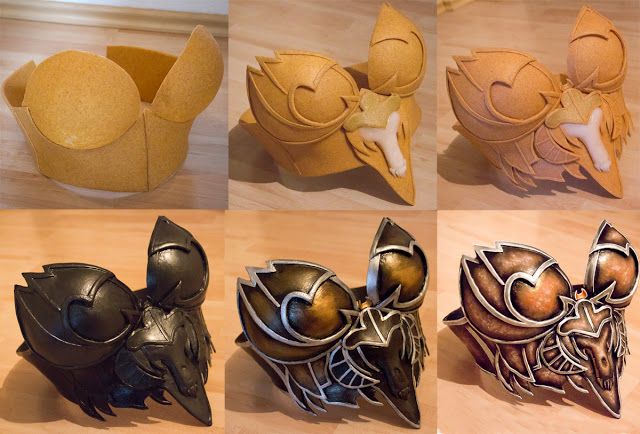
I’m going to talk about different kinds of worbla here as well. Normal Worbla is a thermoplastic with chips of wood in it pretty much. It has an adhesive side and a normal side. When you heat it up it becomes very flexible and can form it into whatever you like. When it cools down it’s extremely sturdy and retains it’s form, but it’s pretty hard to destroy at that point.
The biggest con with worbla is it’s extremely expensive. You have to be very strategic, and pattern out everything. Of course you can reheat and reuse scraps, but if you do a big mess up, that’s $20-60 down the drain.

Black Worbla is another form of worbla but it’s texture is way smoother. It’s of course black so painting it gives a really nice effect. Also I will prime everything before I paint it, but honestly because black worbla is so smooth, you could just apply your paint in layers and be totally fine. The down side is yes there is an adhesive side, but it does not stick well to anything except itself. Here are things you would need to work with worbla:
Heat gun: You must have a heat gun to work with worbla. It really is such a nice investment. I’ve gotten so much use out of my heat gun, whether it’s heating up foam and worbla, or re-heating my tea (Don’t do that. Use it wisely, and don’t be me).
Craft foam/poster board/anything as a base: You’ll need to make your base figure to apply the worbla on. I go with craft foam because it’s flexible and still adds a thickness that I want after the worbla is applied. Also when you don’t line the back of the armor with worbla, the craft foam provides a soft padding that will make the armor more comfortable to wear.
Wood glue/plasti-dip/mod podge/gesso: I’m listing plasti-dip because I know plenty of people use it, but with worbla (especially normal worbla) it still leaves that grainy texture instead of a smooth finish. A couple layers of wood glue does great because it doesn’t really sit into the pores of the material, and it dries clear. Same for mod podge. Gesso is also really nice because it hardens up the material, and with a little sanding it create a very smooth surface. Also gesso can eliminate some unwanted creases, mess ups, and lines that you might accidentally make with the worbla. Gesso can be found in the paint section of Hobby Lobby and Michael’s.
HDPE Sheets
Can’t afford worbla, but want to work with a plastic that will form with heat? You can get HDPE (High Density Polyethylene) on www.tapplastics.com. Of course with these plastics, you will have to work with it a little more than worbla. There won’t be an adhesive side, so you’ll need to find a very strong adhesive to apply the HDPE to base, I recommend craft foam. You’ll need to use the heat gun to form it into any shape you want, but unlike the other materials, it won’t really stick to itself well.
This material will need the same things as the other materials listed above. Painting it is a little bit more of a challenge because of the matte smooth surface, so priming will be your best friend. There are a few tutorials out there that will show you how to work with the material. I like to use this material as a substitute for Worbla TranspArt (transparent plastic that can be heated into any shape. It’s really cool for LED effects).
Cosplay crafting is all about experimenting with what you can find in local stores or just sitting around your house. I’ve seen amazing things made out of pool noodles and cardboard. The internet, especially youtube is tutorial heaven when researching on how to work with any of these materials. There are actually even more materials I didn’t even list, because there are just so many to list. If you have a favorite material you like crafting with, share and comment about it. Even leave some tips! Enjoy!

